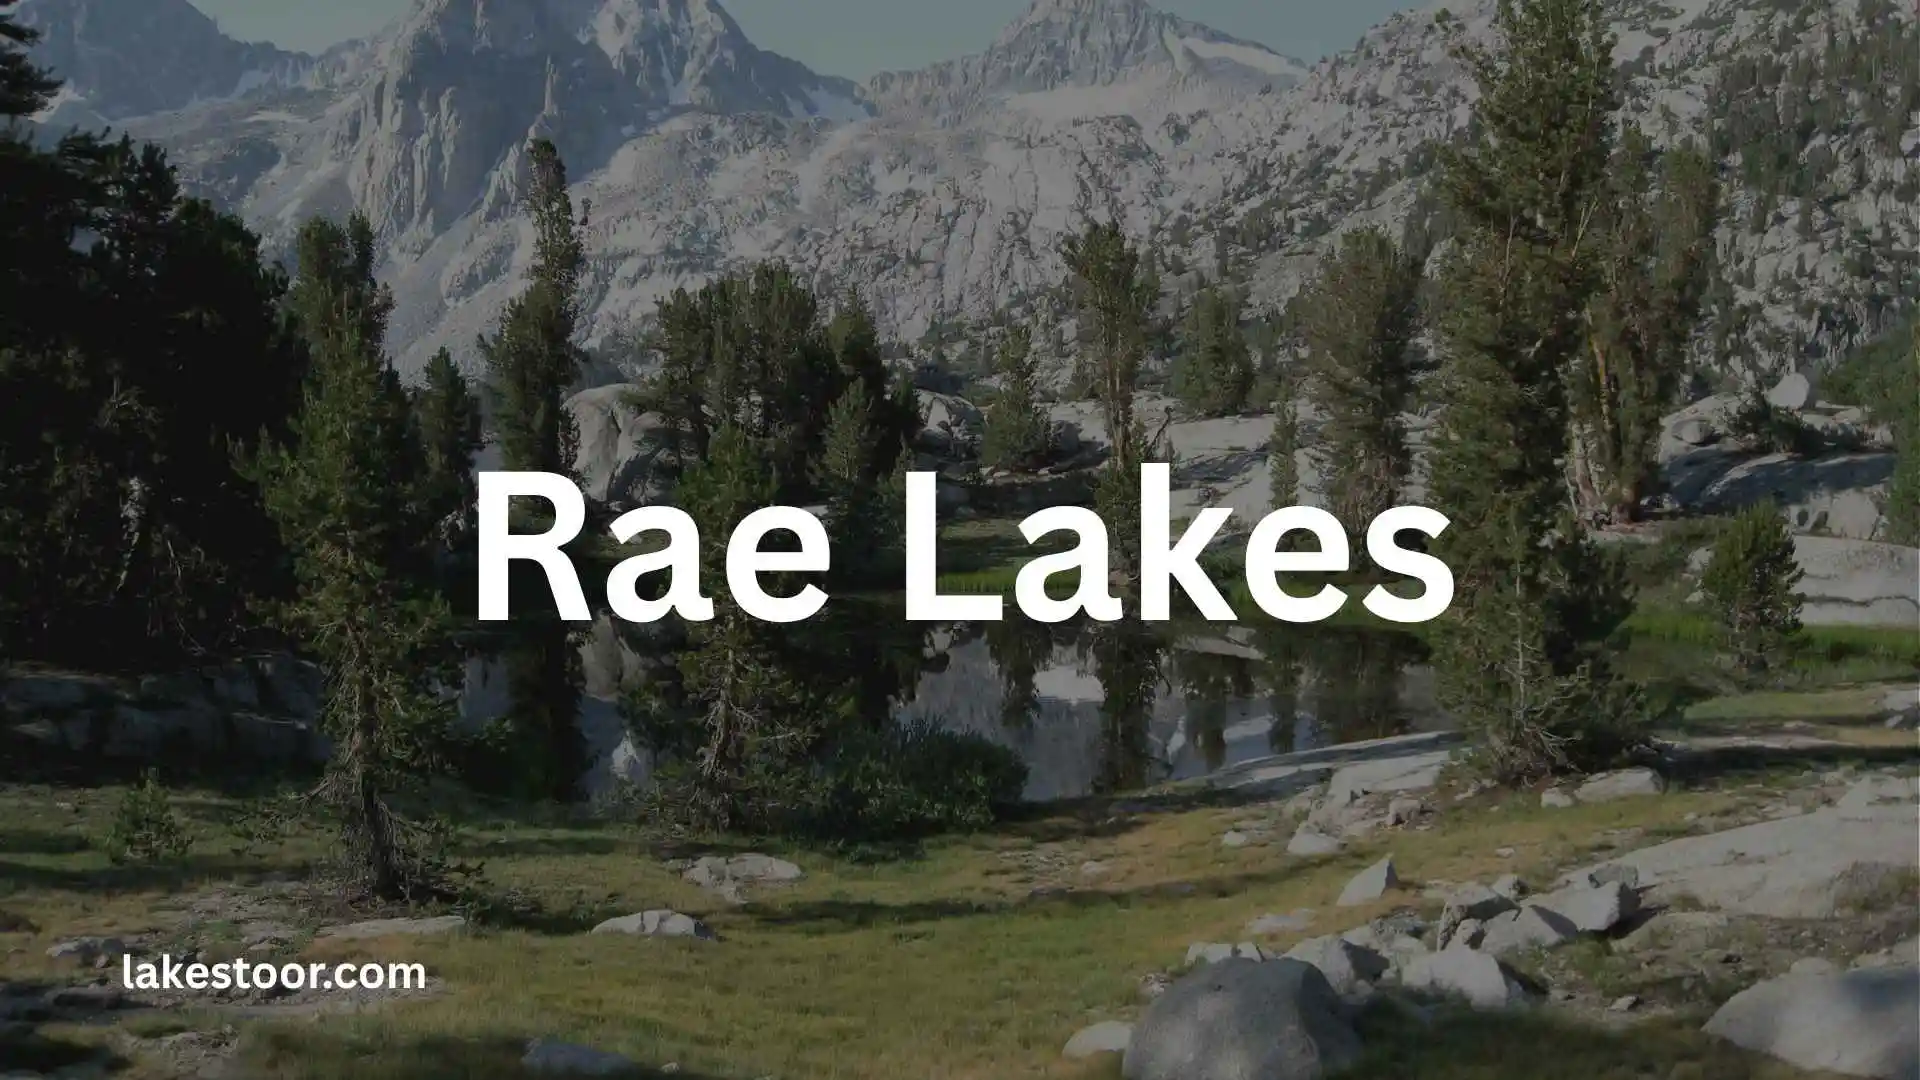
Rae Lakes is one of the most spectacular high-country destinations in California’s Sierra Nevada and the centerpiece of the famous Rae Lakes Loop in Kings Canyon National Park. The route combines deep granite canyons, alpine meadows, waterfalls, rivers, high-elevation lakes, and dramatic Sierra Nevada mountain scenery.
For many hikers, the attraction is not simply reaching Rae Lakes. The journey itself is the experience. The approximately 41.4-mile loop climbs from Road’s End at about 5,035 feet to Glen Pass at approximately 11,978 feet, making it a challenging but highly rewarding backpacking adventure.
If you are researching Rae Lakes for a backpacking trip, this guide covers the route, mileage, difficulty, itinerary options, trailhead logistics, permits, camping, food storage, water, seasonal conditions, clockwise versus counterclockwise travel, and important 2026 trail updates.
What Are Rae Lakes? (Quick Answer)
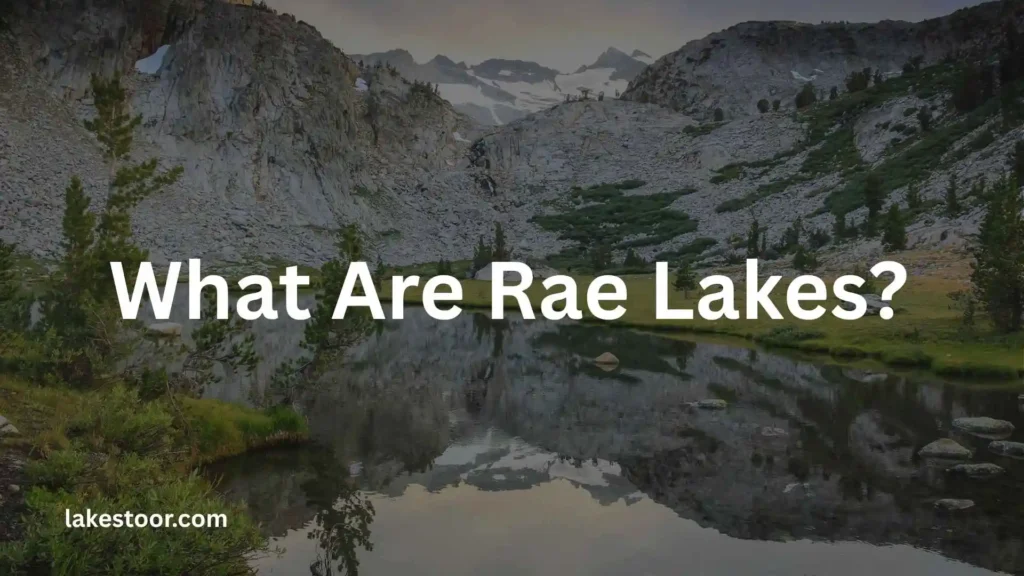
Rae Lakes refers to a group of high-elevation alpine lakes located along the Rae Lakes Loop in Kings Canyon National Park.
The lakes sit in a spectacular mountain basin surrounded by Sierra Nevada peaks. The area is especially popular because the landscape changes continuously along the approach. Hikers pass through forested canyon terrain before reaching increasingly open alpine country.
The Rae Lakes Basin is one of the visual highlights of the entire loop, but reaching it requires substantial hiking and elevation gain.
The official National Park Service lists the Rae Lakes Loop at 41.4 miles, beginning and ending at Road’s End. The trail climbs from approximately 5,035 feet to 11,978 feet at Glen Pass.
Where Is Rae Lakes?
Rae Lakes is in Kings Canyon National Park, California, in the southern Sierra Nevada.
The traditional loop begins at the Road’s End area in Cedar Grove. From there, hikers can approach the high country through either the Woods Creek or Bubbs Creek side of the loop. The National Park Service describes Woods Creek as the clockwise approach and Bubbs Creek as the counterclockwise approach.
Rae Lakes is a wilderness destination rather than a drive-up attraction. You cannot drive directly to the lakes; reaching the basin requires hiking.
Rae Lakes Loop permit
A wilderness permit is required for overnight trips on the Rae Lakes Loop. The main trail begins at Road’s End in Kings Canyon National Park, with permits for the Rae Lakes Loop issued through the Road’s End Permit Station.
During the 2026 quota season, which runs from May 22 through September 26, wilderness permit reservations are available in advance. The park limits the number of people entering from each trailhead, so planning ahead is important during the busy summer season. The current fee is $15 per permit plus $5 per person.
Outside the quota season, permits are self-issued and free. For a Rae Lakes Loop trip, hikers should also carry an approved bear-resistant food storage container because bears are active in this area.
Rae Lakes Loop weather
Weather on the Rae Lakes Loop can change quickly because the trail travels from the hot Kings Canyon area into high-elevation alpine terrain. Temperatures can vary significantly as elevation increases, so hikers should prepare for several types of weather during one trip.
Lower sections around Road’s End and Paradise Valley can feel warm in summer, while higher areas near Rae Lakes and Glen Pass can be much colder. Snow can remain at high elevations well into summer during some years.
Before starting the hike, check the latest weather and trail conditions. Thunderstorms, strong winds, cold nights, snow, and high stream flows can all affect the route.
Rae Lakes Loop counterclockwise
The Rae Lakes Loop can be completed counterclockwise by starting on the Bubbs Creek side of the trail. This route takes hikers through Bubbs Creek before reaching the higher Rae Lakes Basin and Glen Pass.
Counterclockwise hikers generally experience the major climb toward the high country from the Bubbs Creek side. The route then continues through the Rae Lakes area before descending toward Woods Creek and Paradise Valley.
One important consideration is the South Fork Kings River crossing. The original bridge above Paradise Valley was washed out, and river conditions can make this section hazardous. Hikers should check current conditions and be prepared to change their plans if the crossing is unsafe.
Rae Lakes Kings Canyon
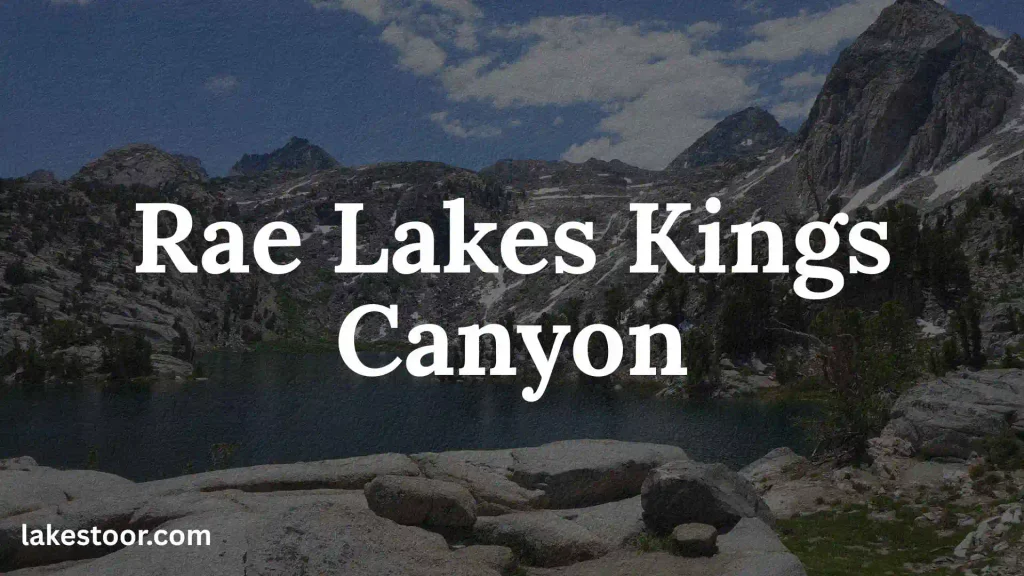
Rae Lakes is located within Kings Canyon National Park in California’s Sierra Nevada. The area is known for granite peaks, alpine lakes, deep canyons, forests, and high mountain passes.
The Rae Lakes Loop is approximately 41.4 miles long and reaches its highest point at Glen Pass, which is about 11,978 feet above sea level. The route provides a dramatic transition from the lower Kings Canyon landscape to the high Sierra.
Because of its length, elevation gain, and remote terrain, the loop is generally considered a challenging backpacking route rather than a casual day hike.
Rae Lakes Loop elevation profile
The Rae Lakes Loop begins at roughly 5,035 feet at Road’s End and climbs to about 11,978 feet at Glen Pass. This creates a major elevation change over the course of the route.
The elevation profile includes long climbs, high alpine terrain, and steep sections around Glen Pass. Hikers should not judge the difficulty only by the total mileage because altitude can make the higher sections considerably more demanding.
A simplified elevation progression looks like this:
- Road’s End: about 5,035 feet
- Paradise Valley: lower elevation canyon terrain
- Woods Creek area: gradual climb into higher country
- Rae Lakes: high alpine basin
- Glen Pass: about 11,978 feet
- Vidette Meadow: descent from the pass
- Bubbs Creek: return toward Kings Canyon
- Road’s End: approximately 5,035 feet
The highest section near Glen Pass can hold snow later into the season, depending on the year’s weather and snowpack.
Bubbs Creek and Rae Lakes Loop
Bubbs Creek is an important part of the southern side of the Rae Lakes Loop. It provides the route used by hikers who begin the loop in the counterclockwise direction.
The Bubbs Creek section features steep and steady climbing, forested scenery, mountain views, and access toward the high Sierra. The trail eventually connects with the Rae Lakes area and other major wilderness routes.
This section can be especially challenging because hikers gain substantial elevation while carrying backpacking gear. Water crossings can also become more difficult during periods of high runoff.
Rae Lakes California
Rae Lakes is located in the Sierra Nevada of California within Kings Canyon National Park. The lakes sit in a spectacular alpine basin surrounded by granite mountains and high-elevation wilderness.
The area includes several connected lakes and provides some of the most recognizable scenery along the Rae Lakes Loop. Clear mountain water, granite peaks, meadows, and reflections make the basin a major destination for backpackers.
The landscape also changes dramatically along the approach. Hikers travel through lower canyon environments before reaching the colder and more exposed alpine country around Rae Lakes.
Rae Lakes Kings Canyon
Rae Lakes is one of the major destinations within the Kings Canyon wilderness. The loop connects the lakes with Woods Creek, Bubbs Creek, Paradise Valley, and Glen Pass.
The National Park Service describes the loop as a roughly 41-mile route featuring canyon views, high alpine lakes, and mountain vistas. The route is accessed from Road’s End, with Woods Creek commonly used for clockwise travel and Bubbs Creek for counterclockwise travel.
Camping rules are also important. Camping at Rae Lakes is limited to one night per lake, while other parts of the route have additional camping restrictions.
Bubbs Creek and Rae Lakes Loop Trailhead
The main trailhead for the Rae Lakes Loop is at Road’s End in the Cedar Grove area of Kings Canyon National Park. From this trailhead, hikers can access both the Woods Creek and Bubbs Creek routes.
The Woods Creek route is commonly associated with a clockwise trip, while Bubbs Creek provides the southern route for a counterclockwise trip.
The trailhead area has parking, restrooms, information facilities, and permit services. Highway 180 provides access to Road’s End, although seasonal road closures can affect access during winter.
Rae Lakes Loop Kings Canyon National Park
The Rae Lakes Loop is one of the major backpacking routes in Kings Canyon National Park. It combines deep canyon scenery with alpine lakes, granite peaks, meadows, forests, and a high mountain pass.
The complete loop is about 41.4 miles according to the National Park Service. Glen Pass is the highest point at approximately 11,978 feet.
A typical trip requires several days because of the distance and elevation changes. Backpackers should plan campsites, water sources, food storage, weather conditions, and river crossings before starting.
One especially important issue is the washed-out South Fork Kings River bridge above Paradise Valley. Current river conditions can affect the ability to complete the loop safely, so hikers should check the latest park updates before departure.
Rae Lakes Loop hike
The Rae Lakes Loop hike is a challenging multi-day backpacking adventure through Kings Canyon National Park. It is popular because one route combines several different Sierra Nevada landscapes.
Major highlights include:
- Kings Canyon and its deep granite canyon
- Bubbs Creek
- Woods Creek
- Paradise Valley
- Rae Lakes
- Glen Pass
- Vidette Meadow
- High Sierra mountain scenery
The route is about 41.4 miles and climbs from approximately 5,035 feet to nearly 12,000 feet at Glen Pass. This combination of distance and elevation makes preparation especially important.
Hikers should carry sufficient food and water treatment equipment, use required bear-resistant food storage, and follow all camping restrictions. Pets and wheeled vehicles are not permitted on park wilderness trails.
Before starting, check the latest trail conditions rather than relying only on older trip reports. Snow, river crossings, bridge conditions, wildfire impacts, and seasonal road access can change the difficulty of the hike.
For 2026, the National Park Service has specifically warned hikers about the South Fork Kings River crossing because the previous bridge remains washed out. Current conditions should be evaluated carefully, and hikers should be prepared to turn around if the crossing becomes unsafe.
Rae Lakes Loop at a Glance
| Feature | Details |
| Location | Kings Canyon National Park, California |
| Main route | Rae Lakes Loop |
| Official loop distance | 41.4 miles |
| Starting point | Road’s End |
| Starting elevation | About 5,035 feet |
| Highest point | Glen Pass |
| Glen Pass elevation | About 11,978 feet |
| Difficulty | Difficult |
| Typical trip | Multi-day backpacking |
| Clockwise approach | Woods Creek |
| Counterclockwise approach | Bubbs Creek |
| Overnight permit | Required |
| Bear-resistant canister | Required |
| Dogs on park trails | Not allowed |
The National Park Service’s trailhead information characterizes the Rae Lakes Loop as a difficult backpacking route with canyon views, high alpine lakes, and mountain vistas.
How Long Is the Rae Lakes Loop?
The official National Park Service distance is 41.4 miles.
The route is long enough that most hikers should treat it as a multi-day backpacking trip rather than a conventional day hike. Your actual daily mileage will depend on your experience, pack weight, elevation tolerance, campsite availability, weather, and whether you stop for side trips or photography.
The National Park Service provides the following approximate mileage around the loop:
| Landmark | Miles from Road’s End via Paradise | Miles from Road’s End via Bubbs |
| Road’s End | 0 | 41.4 |
| Paradise/Bubbs Junction | 1.9 | 39.5 |
| Mist Falls | 3.9 | 37.5 |
| Lower Paradise | 5.7 | 35.7 |
| Middle Paradise | 6.8 | 34.6 |
| Upper Paradise | 10.0 | 31.3 |
| Woods Creek Crossing | 15.7 | 25.7 |
| Dollar Lake | 19.7 | 21.7 |
| Rae Lakes | 22.7 | 18.7 |
| Glen Pass | 24.6 | 16.8 |
| Charlotte Lake Junction | 26.7 | 14.7 |
| Vidette Meadow | 28.2 | 13.2 |
| Junction Meadow | 31.1 | 10.3 |
| Charlotte Creek | 33.9 | 7.5 |
| Sphinx Junction | 37.5 | 4.1 |
| Road’s End | 41.4 | 0 |
These figures are particularly useful when building a realistic itinerary because they show where the major climbs, lakes, campsites, and junctions occur.
How Difficult Is Rae Lakes?
The Rae Lakes Loop is difficult and should not be underestimated.
The challenge comes from the combination of distance, elevation, high-altitude terrain, changing weather, and the need to carry backpacking equipment for several days.
The route begins at approximately 5,035 feet and eventually reaches nearly 12,000 feet at Glen Pass. That means hikers must be prepared for a major change in elevation and potentially very different conditions from those at the trailhead.
Why the Route Is Difficult
The main challenges include:
- Approximately 41.4 miles of hiking
- Significant elevation gain and loss
- Glen Pass at nearly 12,000 feet
- Long days carrying a backpack
- Potential snow at high elevations
- Cold alpine nights
- Strong sun exposure
- Stream and river crossings
- Changing mountain weather
- Wilderness navigation
- Bear-related food-storage requirements
The difficulty can vary considerably from year to year because snowpack and water conditions change.
What Is the Hardest Part of the Rae Lakes Loop?
For many hikers, the climb to and over Glen Pass is the most demanding portion of the loop.
Glen Pass reaches approximately 11,978 feet, making it the highest point on the route.
The combination of steep climbing, altitude, and potentially snowy conditions can make this section particularly challenging.
However, the river crossing near Paradise Valley can also become a serious safety concern. Therefore, it is incorrect to assume that the high pass is always the only major hazard.
Rae Lakes Elevation Profile
Elevation is one of the most important considerations when planning this trip.
The route begins around 5,035 feet at Road’s End and gradually climbs toward the high country. Rae Lakes itself sits below Glen Pass, while Glen Pass represents the highest elevation of the loop.
A simplified progression looks like this:
Road’s End → Paradise Valley → Woods Creek → Dollar Lake → Rae Lakes → Glen Pass → Vidette Meadow → Bubbs Creek → Road’s End
The most important elevation lesson is that the trip is not simply a 41-mile walk. Much of that distance occurs in mountainous terrain with substantial climbing and descending.
If you normally hike at low elevation, spend time preparing for altitude before attempting the loop.
Also Check This Post: Joffre Lakes: Complete 2026 Hiking Guide, Trail, Passes, Camping, Parking and Best Time to Visit
Clockwise vs. Counterclockwise Rae Lakes Loop
The Rae Lakes Loop can be completed in either direction.
Clockwise: Woods Creek
The clockwise route uses the Woods Creek trailhead/approach.
The National Park Service describes Woods Creek as a steady, moderate climb with rivers, vistas, and high lakes. Its first allowed campsite is Paradise Valley, approximately 6.5 miles from the trailhead according to the NPS trail description.
Advantages can include:
- A more gradual initial climb
- Early access to Paradise Valley
- A popular and established approach
- Beautiful canyon and river scenery
Counterclockwise: Bubbs Creek
The counterclockwise direction uses the Bubbs Creek approach.
The NPS describes this trail as starting with a steep climb before becoming more steady. The first campsite is at Sphinx Creek Junction, about four miles from Road’s End.
Advantages can include:
- An early elevation challenge followed by a steadier route
- Different scenery on the first and final days
- The opportunity to experience the loop from the opposite perspective
Which Direction Is Better?
There is no universally best direction.
For many backpackers, clockwise via Woods Creek is attractive because the initial ascent is described by the NPS as a steady, moderate climb. However, your decision should also consider permit availability, current trail conditions, campsite plans, weather, and the condition of the South Fork Kings River crossing.
The National Park Service explicitly identifies Woods Creek as the clockwise approach and Bubbs Creek as the counterclockwise approach.
A 4-Day Rae Lakes Loop Itinerary
A four-day itinerary is a common way to approach the loop, but it requires a solid level of fitness and favorable conditions.
Day 1: Road’s End to Paradise Valley
Approximate distance: 6–7 miles
Start at Road’s End and follow the Woods Creek side toward Paradise Valley.
Along the way, you encounter canyon scenery, rivers, and Mist Falls. The NPS mileage places Lower Paradise at 5.7 miles and Upper Paradise at 10 miles from Road’s End via this side, with Paradise Valley providing important camping areas.
For a more conservative itinerary, use an allowed campsite appropriate to your permit and current regulations.
Day 2: Paradise Valley to Rae Lakes
Approximately 12–17 miles depending on campsite and route
Continue toward Woods Creek Crossing and climb gradually into the higher country.
Dollar Lake lies approximately 19.7 miles from Road’s End via the Paradise side, while Rae Lakes is approximately 22.7 miles from Road’s End.
This is a substantial day if you plan to camp at Rae Lakes, so hikers should honestly assess their fitness and pack weight.
Day 3: Rae Lakes to the Bubbs Creek Side
Approximately 10–15 miles depending on campsite
Start with the climb toward Glen Pass.
Glen Pass is approximately 24.6 miles from Road’s End via the Paradise side and approximately 16.8 miles from the opposite direction. After crossing the pass, descend toward Charlotte Lake Junction and Vidette Meadow.
This can be one of the hardest days of the trip because it combines high altitude with a significant climb and descent.
Day 4: Return to Road’s End
Follow Bubbs Creek back toward the trailhead.
The route passes Junction Meadow and Charlotte Creek before reaching Sphinx Junction and eventually returning to Road’s End. The NPS lists Sphinx Junction at approximately 37.5 miles from Road’s End via the Paradise side and 4.1 miles from the opposite direction.
Because current river conditions can affect the loop, do not treat the final day as automatically straightforward.
A More Relaxed 5-Day Itinerary
A five-day itinerary can be more comfortable for hikers who want to reduce daily mileage.
A possible structure is:
Day 1: Road’s End → Paradise Valley
Day 2: Paradise Valley → Woods Creek/Dollar Lake area
Day 3: Dollar Lake → Rae Lakes
Day 4: Rae Lakes → Glen Pass → Vidette/Bubbs Creek area
Day 5: Bubbs Creek → Road’s End
This gives you more flexibility for photography, weather delays, rest, and difficult terrain.
However, campsite restrictions mean you should build the itinerary around legal camping locations and your actual wilderness permit, rather than assuming you can camp anywhere along the route.
Rae Lakes Permits
An overnight wilderness permit is required for backpacking trips on the Rae Lakes Loop.
The National Park Service states that wilderness permits for the Woods Creek and Bubbs Creek routes are issued from the Road’s End Permit Station.
Because this is a highly popular wilderness route, permit planning should be done before arriving at the trailhead.
Do not plan an overnight trip on the assumption that you can simply show up and find a campsite.
Rae Lakes Camping Rules
Camping regulations are particularly important on the Rae Lakes Loop because of heavy visitor use.
The National Park Service currently lists several specific restrictions:
- Lower Paradise Valley camping is limited to designated campsites.
- Camping in Paradise Valley is limited to two nights.
- Camping at Rae Lakes is limited to one night per lake.
- Charlotte Lake has a two-night camping limit.
- Bullfrog Lake is closed to camping, grazing, and stock travel.
- Kearsarge Lakes has a two-night camping limit.
- Campfires are prohibited above 10,000 feet.
These rules mean that choosing campsites is not simply a matter of hiking until you get tired.
Your itinerary needs to account for where camping is actually permitted.
Best Campsites on the Rae Lakes Loop
There are several important camping areas along the route, but “best” depends on your itinerary and current regulations.
Paradise Valley
Paradise Valley is an attractive early-trip camping area and an important staging point on the Woods Creek side.
The National Park Service lists camping restrictions here, so verify the current designated-site requirements when obtaining your permit.
Rae Lakes Basin
The Rae Lakes area is arguably the most scenic place to camp along the route.
Camping is limited to one night per lake, so it is possible to experience the high-country scenery without staying multiple nights in the same area.
Vidette Meadow
Vidette Meadow lies on the eastern portion of the loop after Glen Pass when traveling clockwise.
It can be useful as part of an itinerary that divides the high-country section into manageable distances.
Sphinx Junction
Sphinx Junction is an important camping point on the Bubbs Creek side and is identified by the NPS as the first allowed campsite when entering via Bubbs Creek.
How to Get to the Rae Lakes Trailhead
The traditional Rae Lakes Loop begins at Road’s End in Kings Canyon National Park.
The trailhead area provides parking, restrooms, information, and access to the permit station.
The key thing to understand is that the trailhead is not the same as Rae Lakes itself. You still have a long wilderness journey ahead after parking.
Before driving to Road’s End, check current road conditions and park alerts because access conditions can change.
2026 Rae Lakes Trail Conditions
If you are hiking Rae Lakes in 2026, current trail conditions are especially important.
The National Park Service’s 2026 reports provide several important updates.
As of the latest listed reports:
- The Rae Lakes Basin was snow-free as of June 18, 2026.
- Glen Pass was snow-free as of July 7, 2026.
- The South Fork Kings River crossing above Paradise Valley remained a major concern.
- On June 29, 2026, the South Fork Kings River was reported as thigh-deep, swift, and cold.
- The crossing was reported as not stock passable at that time.
These conditions demonstrate why a previous year’s trail report is not enough for trip planning.
Check the official NPS trail-condition information immediately before departure.
The Washed-Out South Fork Kings River Bridge
One of the most important current issues on the Rae Lakes Loop is the washed-out bridge above Paradise Valley.
The National Park Service states that the bridge washed out during the winter of 2016–2017 and that construction of a replacement bridge will not begin before 2027.
This is not a minor inconvenience.
Depending on water level and conditions, crossing the South Fork Kings River can be extremely hazardous. The NPS advises hikers to carefully evaluate conditions, be prepared to turn back, and notes that trips attempting the crossing may not be possible until sometime in July.
If you are starting the loop from Bubbs Creek, the NPS warns that you may need to backtrack if the crossing cannot be safely completed.
Never assume the river will be safe simply because someone completed the crossing in a previous year.
When Is the Best Time to Hike Rae Lakes?
The most practical season is generally summer into early fall, but the exact window changes every year.
Two major factors determine accessibility:
- Snow at high elevations
- Water levels at river and stream crossings
The National Park Service notes that high water can be a problem in May and early June and that Glen Pass may remain impassable to hikers until mid-to-late July in some years.
Therefore, the best month depends on the specific year’s snowpack and water conditions.
Early Season
Early-season hiking can mean:
- Snow on high passes
- Cold nights
- High stream flows
- Difficult river crossings
- More complicated navigation
Mid-Summer
Mid-summer often offers better access to the high country, but conditions can still change quickly.
Late Summer and Early Fall
Late summer and early fall can provide excellent hiking conditions, but colder nights and changing weather should be expected.
Always check the current NPS report rather than relying solely on seasonal averages.
Water on the Rae Lakes Loop
Water is available along portions of the route, but hikers should treat natural water before drinking it.
Carry a reliable water filter or purification method and understand where your planned campsites are located relative to water.
Water availability and crossing depth can change considerably with snowmelt and weather.
The same river that appears manageable in a photograph can become dangerous when flows rise.
Also Check This Post: Plitvice Lakes: Complete Travel Guide, Routes, Tickets, Best Time to Visit & Things to Do
Bears and Food Storage at Rae Lakes
Bear safety is an essential part of Rae Lakes planning.
The National Park Service reports significant bear activity along the route and states that hikers are required to carry portable bear-resistant food canisters. The park notes that bears have successfully obtained food that hikers attempted to hang in trees.
Your food-storage system should therefore be planned before arriving at the trailhead.
A bear-resistant canister protects your food while also reducing the chance that your campsite becomes associated with human food.
What to Pack for Rae Lakes
A suitable Rae Lakes backpacking setup should include equipment appropriate for a multi-day, high-elevation wilderness trip.
Essential Gear
- Backpack
- Tent or appropriate shelter
- Sleeping bag or quilt
- Sleeping pad
- Bear-resistant food canister
- Backpacking stove where permitted
- Water filter or purification system
- Water bottles or reservoir
- Headlamp
- Navigation tools
- Offline maps
- First-aid kit
- Trekking poles
- Rain gear
- Warm layers
- Sun protection
- Sunglasses
- Sunscreen
- Appropriate hiking footwear
- Emergency communication device if available
Food
Bring enough food for your planned itinerary plus an emergency margin.
High-mileage mountain hiking burns substantial energy, and appetite can increase at altitude.
Avoid packing unnecessary weight, but do not cut essential calories simply to make your backpack lighter.
Do You Need Trekking Poles?
Trekking poles are not mandatory, but many hikers find them useful on the Rae Lakes Loop.
They can provide additional stability on:
- Rocky terrain
- Steep climbs
- Descents
- River approaches
- Snowy sections
- Long backpacking days
They can be particularly useful when carrying a heavy pack.
Is Rae Lakes Suitable for Beginners?
The Rae Lakes Loop is possible for a well-prepared beginner, but it is not an ideal first backpacking trip.
A beginner should ideally have experience with:
- Overnight camping
- Carrying a loaded backpack
- Long-distance hiking
- Navigation
- Water treatment
- Food storage
- Mountain weather
- Basic wilderness safety
A shorter backpacking trip can be a better place to learn these skills before attempting a 41-mile high-elevation loop.
Can You Hike Rae Lakes Without Backpacking?
You can visit portions of the Rae Lakes area through different approaches, but the traditional Rae Lakes Loop is fundamentally a backpacking route.
A day hiker could travel a portion of the trail, but completing the entire 41.4-mile loop in a single day would be an extreme endurance undertaking and is not the normal way to experience the route.
The National Park Service identifies the loop as a difficult backpacking route.
Rae Lakes via Kearsarge Pass
Another way to reach the Rae Lakes region is from the east via Kearsarge Pass.
This approach connects with the high-country trail system around the Rae Lakes area and can be useful for hikers approaching from the eastern Sierra.
However, it is not simply an alternative parking area for the standard Road’s End loop. It involves a different trailhead, different access considerations, and potentially different permit requirements.
If you are planning an east-side approach, research the current Inyo National Forest and Kings Canyon National Park regulations for your exact itinerary.
Photography at Rae Lakes
Rae Lakes is an excellent destination for landscape photography.
The most photogenic elements include:
- Reflections on alpine lakes
- Granite peaks
- Mountain passes
- Alpine meadows
- Waterfalls
- River valleys
- Sunrise and sunset light
- Wildflowers during their seasonal bloom
The Rae Lakes Basin is particularly memorable because the lakes, granite terrain, and high Sierra skyline create a classic alpine landscape.
Bring spare batteries or a reliable power bank because there may be no convenient opportunity to recharge devices during the trip.
What Makes Rae Lakes Special?
Several characteristics make Rae Lakes stand out among Sierra Nevada backpacking destinations.
Dramatic Elevation Changes
The route takes hikers from a relatively low canyon environment to nearly 12,000 feet at Glen Pass.
Multiple Landscapes
Instead of seeing one type of scenery for 40 miles, you move through forests, canyons, meadows, rivers, and alpine basins.
High Alpine Lakes
The Rae Lakes Basin provides the scenery many hikers consider the highlight of the journey.
Wilderness Experience
Much of the route feels remote despite its popularity.
Connection to Major Sierra Trails
The route also interacts with portions of the broader Sierra trail network, including connections associated with the John Muir Trail and Pacific Crest Trail.
Rae Lakes vs. Rae Lakes Loop
These terms should not be confused.
Rae Lakes refers to the alpine lake destination and surrounding basin.
Rae Lakes Loop refers to the approximately 41.4-mile backpacking circuit that begins and ends at Road’s End.
Someone searching for “Rae Lakes” may therefore be looking for information about either the lakes themselves or the entire backpacking route.
For trip planning, understanding the distinction is important.
Important Safety Tips for Rae Lakes
Before starting the trip:
Check Trail Conditions
Trail conditions can change rapidly, particularly around high passes and rivers.
Check the River
The South Fork Kings River crossing is currently one of the most important hazards on the loop. Do not cross if conditions are unsafe.
Prepare for Altitude
Glen Pass reaches nearly 12,000 feet, so altitude should be taken seriously.
Watch the Weather
Mountain weather can change rapidly.
Carry a Bear Canister
The NPS requires portable bear-resistant food canisters along this route.
Know Your Turnaround Point
A safe backpacker knows when conditions have become unsuitable and is willing to change the itinerary.
Is Rae Lakes Worth the Effort?
For hikers who enjoy challenging mountain backpacking, Rae Lakes is absolutely worth considering.
The route offers an unusually diverse combination of scenery, including canyon walls, forests, rivers, waterfalls, alpine meadows, high lakes, granite peaks, and a nearly 12,000-foot mountain pass.
However, the route is not appropriate for every traveler.
If you want a short, easy nature walk, Rae Lakes is not the right destination.
If you want a demanding multi-day Sierra Nevada adventure and are prepared for the physical and logistical requirements, it can be an exceptional experience.
Frequently Asked Questions About Rae Lakes
How many miles is Rae Lakes?
The official Rae Lakes Loop is approximately 41.4 miles.
How many days do you need for the Rae Lakes Loop?
Most hikers should plan several days. Four days is a reasonable target for experienced backpackers, while five days can provide a more relaxed schedule.
What is the highest point on the Rae Lakes Loop?
Glen Pass is the highest point at approximately 11,978 feet.
Is Rae Lakes difficult?
Yes. The loop is officially described as a difficult backpacking route and combines long mileage with significant elevation and high-country conditions.
Can beginners hike Rae Lakes?
A fit and well-prepared beginner may be able to do it, but the route is better suited to hikers who already have backpacking and mountain-hiking experience.
Which direction should you hike Rae Lakes?
The loop can be completed clockwise via Woods Creek or counterclockwise via Bubbs Creek. The best direction depends on your permit, itinerary, fitness, and current conditions.
Do you need a permit for Rae Lakes?
Yes, overnight wilderness trips require permits. Wilderness permits for the Woods Creek and Bubbs Creek routes are issued from the Road’s End Permit Station.
Can you camp at Rae Lakes?
Yes, but camping is regulated. The NPS currently limits camping at Rae Lakes to one night per lake.
Are dogs allowed on the Rae Lakes Loop?
No. Pets are not allowed on park trails.
Do you need a bear canister?
Yes. The National Park Service requires portable bear-resistant food canisters on the route because of active bears and unsuccessful food-hanging practices.
When is Rae Lakes accessible?
The answer changes each year. High water can be a problem in spring and early summer, while Glen Pass can remain snowbound into July. Check current NPS trail conditions before your trip.
Is the Rae Lakes bridge open?
The South Fork Kings River bridge above Paradise Valley is washed out. The NPS says replacement construction will not begin before 2027, and current river crossings can be hazardous.
Final Thoughts
Rae Lakes is one of the Sierra Nevada’s most memorable backpacking destinations because it combines spectacular scenery with a genuine wilderness challenge.
The 41.4-mile Rae Lakes Loop takes hikers from Road’s End through deep canyons and alpine landscapes to the beautiful Rae Lakes Basin and over 11,978-foot Glen Pass before returning through the opposite side of the loop.
The best trip is not necessarily the fastest one. Give yourself enough time to handle elevation, weather, difficult terrain, and unexpected trail conditions.
Most importantly, treat current conditions as part of your trip planning. In 2026, the washed-out South Fork Kings River bridge and potentially hazardous crossing conditions are especially important considerations. The latest NPS reports should be checked immediately before departure.
With the right permit, realistic itinerary, appropriate gear, bear-safe food storage, and careful attention to conditions, Rae Lakes can deliver an unforgettable high-Sierra backpacking experience.
Also Check This Post: Plitvice Lakes National Park: Complete Travel Guide, Routes, Tickets, Best Time & Things to Do

Hi, I’m Henry Ashford, a writer with a lifelong interest in lakes, landscapes, and the natural environment. I love exploring how lakes influence wildlife, local communities, tourism, and history. My goal is to create informative content that encourages readers to appreciate and protect freshwater environments.
Every article I write is based on careful research and presented in a straightforward, engaging style that makes learning enjoyable.
Books I’ve Written:
- Discovering the World’s Great Lakes
- Freshwater Landscapes: Stories from Around the Globe
 Oliver Whitmore
 Charlotte Pembroke